Better Pictures When Shooting the Moon
About once a month in the evening, barring clouds, a full moon appears in the Eastern sky. The sighting inspires poets, astronomers, lovers and photographers.
This blog is appropriate, as on July 12 we experienced a “Super Moon”, where the elliptical orbit of the moon brings it closest to earth and, according to NASA, a full moon at perigee (closest point) is up to 14% larger and 30% brighter than one at its farthest point, or apogee. We will have an even bigger Super Moon to photograph on August 10, 2014.
Here are some tips for shooting the moon:
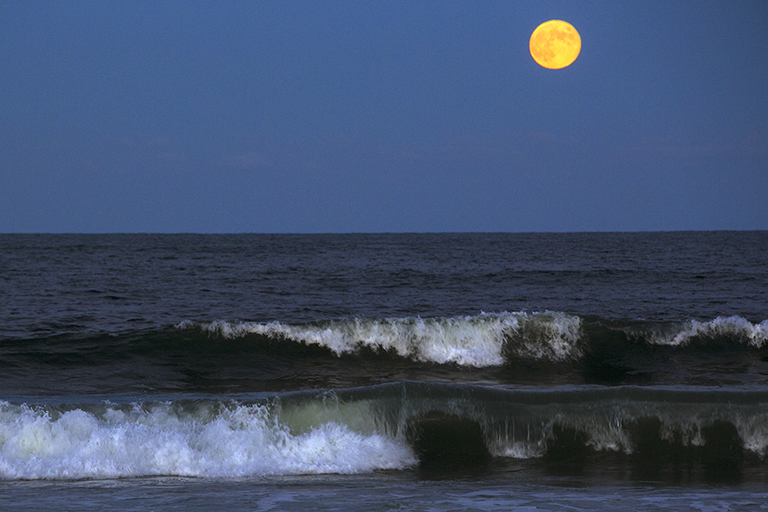
Seascape in Outer Banks NC
1. The full moon is bright. For your camera exposure, use a similar one to what you would use when you photograph something on earth in bright sunlight. The natural color of the moon is a light grey and reflects sunlight very well.
2. Make sure you take your exposure setting off the moon, not the surroundings. If you don’t, the moon will appear as a white “hole” in the sky. Do not use auto exposure here!
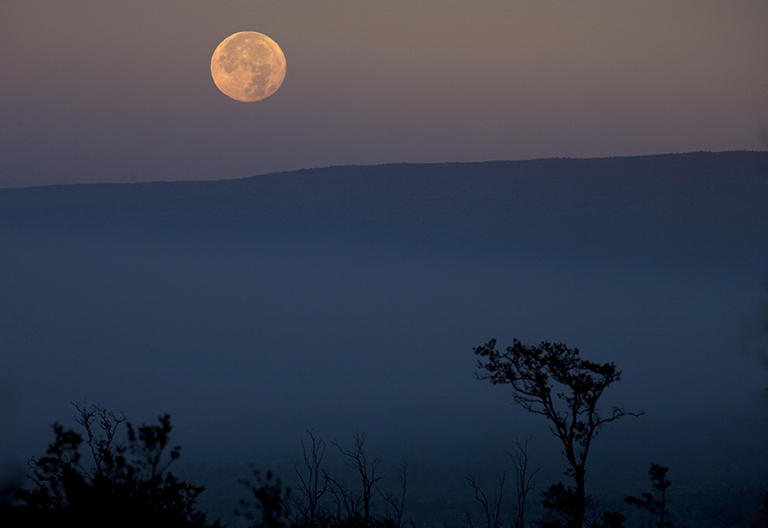
3. Photograph the moon the night before the actual full moon. I call this night the “photographer’s moon”. The reason for doing this is that the moon looks full, but rises right after sunset, At this time, there is enough ambient light on “earth objects”, and the moon will be about the same exposure as these objects. Now the moon is located in a position showing where you are taking the picture. Note the seascape and mountains in the illustrations here. Don’t worry about the moon not being a full moon – it will look full in your photographs.
500mm Lens – Hawaii
4. Long super telephoto lenses increase the relative size of the moon compared to the landscape and can add to dramatic effect. Make sure you have a small enough aperture (f stop) to have both the stuff on earth and the moon in focus. Obviously, the moon will be focused at “infinity”. You will need a sturdy tripod when using these lenses.
5. Make sure your shutter speed is at least a thirtieth of a second, preferably faster. The moon moves more quickly than you think, and with slower shutter speeds you will experience blurring moons in your pictures.
6. When it is on the horizon, the color of the moon varies. We refer to “harvest moons” or “red moons”, etc. This is because you are looking at the moon through much more atmosphere than when the moon is overhead. Dust in the air or just after a rain can affect the color of the moon dramatically.

Smart Phone App
7. So where will the moon rise? You can use apps or websites on your smart phone to figure this out. I use the app The Photographer’s Ephemeris, where I can designate my location and seen not only the latitude, longitude and elevation where I am at, but immediately see times of sunrise, sunset, moonrise, moonset and the compass directions of each.
Then I use the compass in my smart phone to visually locate where on the horizon the moon will rise on that particular evening. I look through the camera and move back and forth, right and left, so that the spot on the horizon where moonrise will happen is composed within my “earth” frame. I’m ready! Also note that the moonrise on each successive night is quite a few compass points away from the previous one.
8. What if your foreground subject is facing to the west? Look at your moonset direction and get up early in the morning and photograph the moonset at dawn.
Want to have a hands-on photographic experience? Join me on one of my international photography tours. Go here, or back to the menu bar and select “Workshops”.

Smith Island Maryland