Tag Archives: instruction

Blackwater Wildlife Refuge Photo Workshop

Save your spot for a fantastic weekend of photographing migratory waterfowl in the Blackwater Wildlife Refuge near Cambridge, MD.  Named one of the “Last Great Places” by the Nature Conservancy, Blackwater Wildlife Refuge is the perfect location to see and photograph wildfowl on the Atlantic Flyway. October is a peak month for Snow Geese, Canada Geese and a panoply of migrating ducks. The refuge contains one-third of Maryland’s tidal wetlands harboring a wealth of aquatic animals, so be prepared for other species to cross in front of your lens. This workshop is sponsored by the Ward Museum of Waterfowl Art and is designed for photographers who want to hone their wildlife photography skills.

Ward Art in Nature Photo Festival Conference


Ward Museum Art in Nature Photo Festival Education Conference

Saturday, August 13 from 3:00 PM to 5:00 PM

Travel photography is an ever-popular and challenging activity. Almost everyone who takes pictures loves to capture their travel destinations in photographs. Often we travel just to give our eyes something fresh to visually inspire us. Long-time National Geographic staff photographer Bob Madden has traveled the world for many years for the magazine and other clients. In this presentation he illustrates tips and tricks to improve your travel pictures.

In conjunction with the 6th annual Art in Nature Photo Festival, the Ward Museum Education Department will offer a wide variety of workshops, field sessions, and seminars lead by expert photographers.

Registration is required for all workshops, field sessions, and seminars. Space is limited.
Online registration is encouraged.

To Register, go here.

Ward Museum Photo Workshop

The goal of this workshop is to help amateur photographers with no real experience make better images.The subtitle of this class is “A Non-Technical Hands-on Course Designed to Help Amateur’s Make Better Pictures”

During this weekend course, students will take their own pictures at several locations near Salisbury, MD with the Bob Madden former National Geographic staff photographer nearby for questions and suggestions.

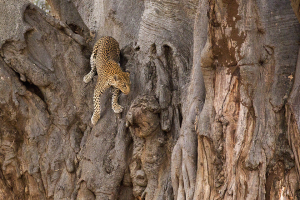
Patience Makes For Better Pictures

I was going to call this blog “Waiting It Out”, but the term that Chris Johns, the Editor of the National Geographic and a photographer uses is “circling back”.

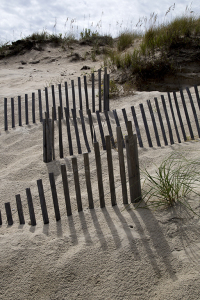
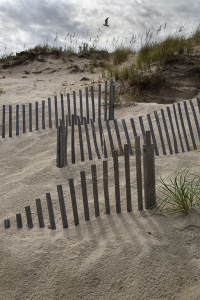
What Chris means by this is that the perfect time to capture the subject in front of you may not be now. It may happen in a few minutes, a few hours, days or never. The important thing is to have faith that this particular subject will make a fine photograph, because it speaks to you as being something of importance.

Baobob Leopard

One and a Half Hours

Snow Fence no shadows

15 Min. Later

Snow fence no shadow

At Seashore

This does not mean the subject is “newsworthy”, an amazing scene, or a fantastic event. It just speaks to you. This gives it importance. And if it is really important, are you ready to walk away because the light isn’t right, the subjects aren’t in place or you need to be someplace else?


Fred Maroon, a fine Washington, DC photographer said, “There is always another plane”. It is a good way of saying that many great images take patience to make them.

Ginos in Brooklyn

Four Days

During all of my workshops I spend some time talking about managing one’s photographic expectations. If you are with a non-photographer or on a tour or heavily scheduled, you have little opportunity to hang back and wait.


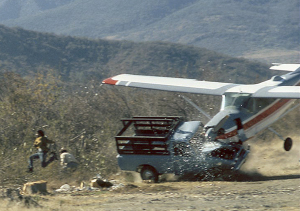
And it can be tiresome waiting at a particular location for hours – especially with wildlife, as the moment you were waiting for generally happens very quickly and you cannot stay focused (pun intended) for long time periods. Frans Lanting, a terrific wildlife photographer was once asked how he stays focused to make those wonderful shots. His answer? “Ninety five percent of the time I miss it!”

Plane Crash

Two Seconds!

To keep fresh, do as Chris Johns says and circle back. Leave that location for a bit and then come back to it. But remember to return, as perseverance pays. An article was once done or several of the photographers at National Geographic and after the author interviewed us she entitled the article “A Terrifying Dedication.”

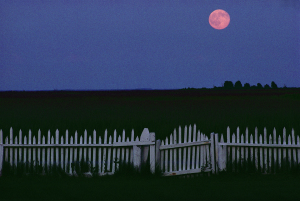
Moon over Smith Fence

Five Months


Throughout this blog I have posted a number of images with captions that indicate the “wait times” necessary to capture the image.

Join me for a domestic or international workshop where there is a continuing conversation on subjects like this.


Sunrise , Sunset – How to Photograph the Sun

The previous blog concerned photographing the moon, and following this extra-terrestrial theme, here is a blog about photographing the sun. I used to say that perhaps 15% of all photographs were of sunsets, but with the advent of smart phones and selfies, this percentage has declined dramatically.

Unlike moon photography, determining the location of the sunrises and sunsets is relatively easy, as the location is visible for some time prior to the actual event. Here are some tips for creating excellent sun images:
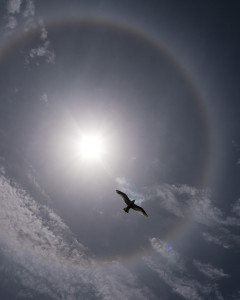
Sun Halo

Sun Halo in Florida

1. NEVER look directly into the sun, especially through a telephoto lens. This is a great way to permanently damage your retinas. When aiming the camera, frame what you want above or below where the sun is, and then move the camera up or down to include the sun. If you do look through the lens, look anywhere in the frame but at the sun. Reflections of the sun off of the water also count.

Some cameras have a depth-of-field preview button next to the lens. You can configure the lens for the smallest aperture and use this button to look through the camera at the sun with minimum exposure, but it’s still dangerous.

2. As the sun sinks (or rises) into the atmosphere, a phenomenon similar to moonrises and moonsets occurs. When it is on the horizon, the color of the sun varies. This is because you are looking at the sun through much more atmosphere than when it is overhead. Dust in the air or photographing the sunset just after a rain can affect the color dramatically.
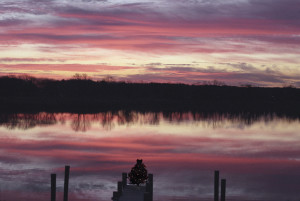
Christmas Clouds

Christmas Clouds

3. Clouds can help. The color of the clouds just after sunset or before sunrise can mitigate the intensity of the direct sun and add dimension to your image. No clouds create a situation where there is little drama in your sunset picture.

4. “Mask” the sun. Use atmospheric conditions such as fog, smog or haze to create “filters” where the sun is much more distinguishable and appears with definition rather than as a white orb. Other objects in your frame will have more character with a masked sun.

5. At sunrise or sunset, objects on earth will be silhouetted, as you are looking directly into your only light source and it is bright. Take your exposure reading off of the brightest parts of your framed picture, otherwise the resultant photograph will looked “washed out”. For sunsets with a fantastic array of multicolored clouds, position the horizon in the bottom third of the frame for maximum effect. You can use reflectors to bounce back some of the light, or use flash to “fill in” the light on subjects close to the camera (like people). Off-camera flash is desirable. With many cameras you can adjust the intensity of the flash so that your subjects are not extremely overexposed against a coal-black background.
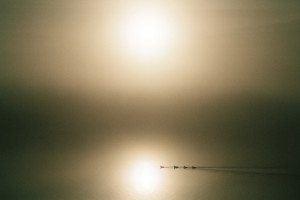
Geese in Fog

Geese in Fog

6. We have seen many sunsets where the actual location is a mystery. The sun in Nova Scotia is the same as the sun in Costa Rica. Make yours different by including identifying objects such as lobster boats or palm trees.

7. Turn around. Sometimes the way the light at dawn or dusk strikes the landscape is much more interesting than just shooting another sunset.

8. Long shadows during the “golden hour” prior to sunset “model” the subject, creating a more three-dimensional effect for your actual two-dimensional image. Take advantage. You can still shoot the actual sunset.
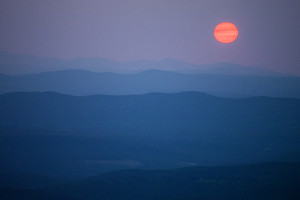
 

White Mt Sunset

White Mountains Sunset

Additional tip: You can adjust the exposure on your iPhone by tapping the area where you want the best exposure, – i.e. the sun, or the foreground. You can instantly see how the resultant image will be affected.

Want to have a hands-on photographic experience? Join me on one of my international photography tours. Go here, or back to the menu bar and select “Workshops”.